Add a Floral Flourish to your Festive Offerings this Christmas!
Christmas is nearly upon us, so I thought I would provide a little tutorial, giving you all the tools and instructions you need to make your own Christmas Chrysanthemum!
You can simply use the flower as a festive decoration, or add it as a stylish embellishment to a special present. Alternatively, why not make several of them to use as unique place settings; just write your guests’ names on the leaves of the flowers and place on your festive table or dinner party set up.
You Will Need:
Instructions:
 |
Step 1: Cut out all the pieces from the template
|
 |
Step 2: Use your scissors to curl the petals of each of the 6 flower pieces.
|
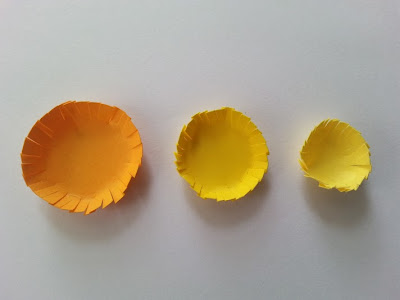 |
Step 3. Snip small incisions around the edges of all 3 circular pieces, then bend the snipped edges up to form 3 cup-shapes.
|
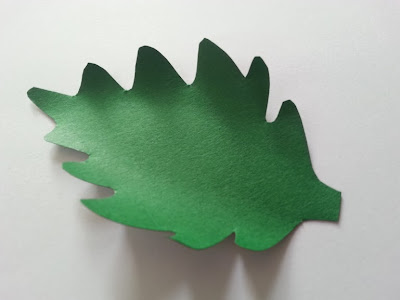 |
Step 4. Use
your scissors to curl the edges of the leaf slightly
|
 |
Step 5. Use
a small dot of glue to attach each set of petals together, stacking them from
largest to smallest; the top sets of petals should be placed so as to fill the
gaps between the lower sets.
|
 |
Step 6. Use
a small dot of glue to attach the circular pieces together, stacking from
largest to smallest.
|
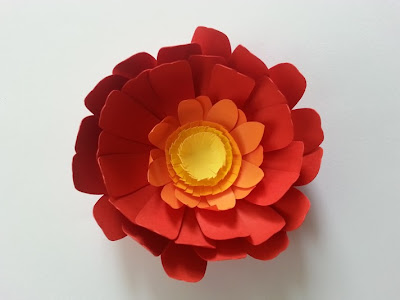 |
Step 7. Use
a small dot of glue to attach the stacked circular pieces to the centre of the
stacked petals.
|
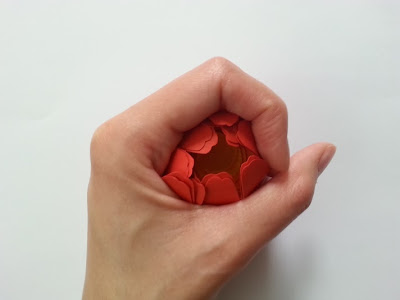 |
Step 8. If
you would like a more tightly-closed effect, cup the flower in your hand and
gently squeeze the petals together.
|
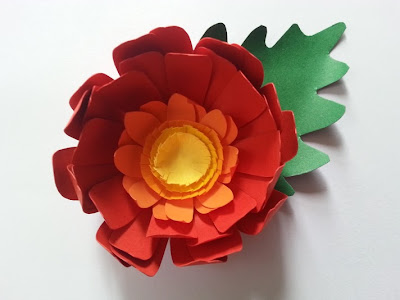 |
Step 9. Use
a dot of glue to attach the leaf to the underside of the flower.
|
 |
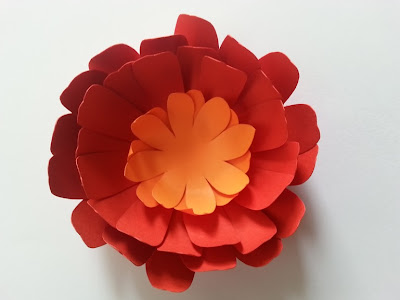
| All Done! |
N.B. The pdf template is for personal use only, thanks guys!